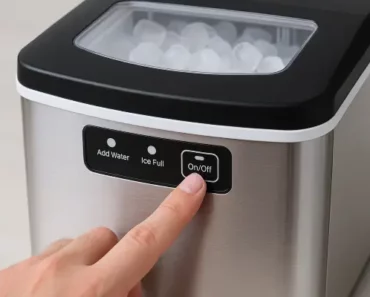
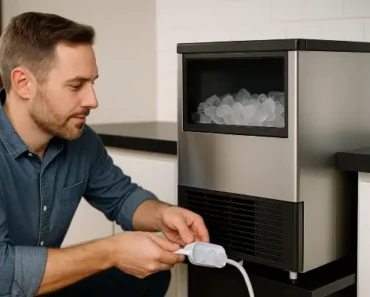
Learning how to drain an ice maker properly is essential for keeping your appliance working well and helping it last longer. Whether you’re preparing your countertop unit for winter storage or getting your commercial undercounter model ready for cleaning, proper drainage stops mold growth and mineral buildup. Most portable ice makers have a simple drain plug at the bottom, while built-in commercial models usually have more basic drainage systems with their own lines.
Regular draining helps remove standing water that can grow germs and affect ice quality. This basic maintenance step takes just minutes but saves lots of trouble later on. Ice makers collect mineral deposits from tap water over time, which can affect how well they work and how the ice tastes. If you still have doubt, read my article of “Do ice makers need to be drained?”
I’ve made a comprehensive “Ice Maker FAQ” series collecting all common ice maker problems to help Ice Artisan readers quickly troubleshoot their ice maker units.
- ⚖️ Countertop vs undercounter ice makers
- 👍 Are portable ice makers worth it?
- ⚡ How much electricity does an ice maker use?
- 💧 Does an ice maker use a lot of water?
- 🪣 Do ice makers need to be drained?
- 🚫 Can ice makers cause water damage?
- 🚰 Do ice makers need water lines?
- 🔊 Are countertop ice makers loud?
- 😭 Do ice makers make a lot of noise?
- 🔗 Are countertop ice makers safe?
- ⛺ Can ice makers be used outdoors?
- 🔌 Can ice makers be left running all the time?
- 🚗 Can ice makers be used in RV?
- 🗄️ Can ice makers be installed in cabinets?
- ❄️ Do portable ice makers keep ice frozen?
- 🛠️ Can ice makers be used in garages?
- 📄 Do ice makers store ice?
- 🚀 How do ice makers make ice so fast?
- 💡 How does ice maker work?
- 🎰 How does a commercial ice maker work?
- 🛠️ How to install an undercounter ice maker?
- ❄️ How to make clear ice in ice maker?
- 🪣 How to increase ice production in ice maker?
- ⏳ How long does an ice maker take to make ice?
- 🔗 When to replace ice maker filter?
- ⏱️ When to replace ice maker?
- 💡 How to clean ice maker?
- 😭 Why does my ice maker smell bad?
- 🫗 How to drain an ice maker?
- 🪣 How to unclog an ice maker?
- 🔗 How do I unstick my ice maker arm?
- 💧 How to fix ice maker leaking water?
- ❄️ Why is my portable ice maker making too much ice?
- 🥵 Why is my ice maker hot?
- 🔌 What happens if you don’t turn off the ice maker?
- 🧊 How to fix ice maker not making ice?
Ice Artisan‘s best picks
How to drain an ice maker?
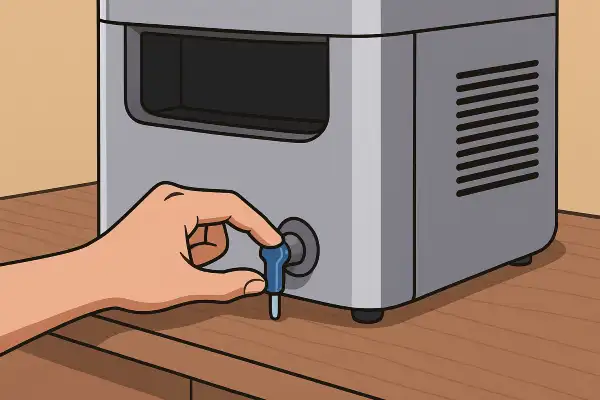
To drain an ice maker, you need to turn of the power of your ice maker first, then remove the drain plug to allow all water to flow out completely. Every ice maker needs to be drained regularly to maintain optimal performance. Built-up water can lead to several issues including bacterial growth, mineral deposits, and mechanical failures. This is the common concept between appliances running with water.
In areas with very hard water, the mineral buildup can be really, really bad. These calcium and magnesium particles collect inside your ice maker’s reservoir and components, eventually forming scale that restricts water flow and damages moving parts. Regular drainage helps flush out these minerals before they can solidify and cause lasting damage to pumps, valves, and cooling elements.
I always recommend to know how to clean ice maker to make sure you keep your ice machine investment in good shape. Besides removing the mineral buildup, you can help remove all scraps of ice that can block your ice maker’s storage.
What I need to drain an ice maker?
To drain an ice maker, you just need minimal equipment, but having the right tools ready makes the process much smoother. For basic ice maker drainage tasks, have these essential tools:
- A bucket for waste water
- Soft cleaning cloths for cleaning
- Small funnel (for certain models with narrow drain openings)
- Screwdriver (depending on your model)
- Owner’s manual for model-specific instructions
If you’re looking to clean your ice maker, you’d better have a manufacturer-approved cleaner or vinegar for thorough cleaning.
How to drain a countertop ice maker?
For countertop ice makers, the process to drain them is quite straightforward that takes just minutes to complete. First turn off and unplug your countertop ice maker. Then you need to empty the ice storage or wait for all the remaining ice to melt completely, which typically takes 15-30 minutes depending on your room temperature. Take a bucket beneath the ice maker and open the drain plug (which is normally in the bottom of your countertop ice maker).
Normally, the drain plug is located on the bottom of your countertop ice maker. The small cap can be opened by twisting counterclockwise or pulling out. Tilting the unit slightly might help drain water more effectively from certain models.

If you have an ice maker that doesn’t have a drain plug, which is unfortunate for you, manually tilt the unit so the water will come out from the storage. Carefully lift one side and slowly rotate the machine until water begins flowing out from the ice basket area. Take care not to tilt too quickly, which might cause water to spill onto electronic control board.
After all water has drained, leave the unit open for about an hour to dry, or use a clean cloth to wipe down interior surfaces. This extra step prevents mold growth and removes any residual moisture that could cause odors. Secure the drain plug again but avoid overtightening, which might damage the threads or crack the plug.
How to drain an undercounter ice maker?
While the undercounter ice maker is complex, it is always design with properly draining water in mind. That’s why you will find an undercounter ice maker with two types of drainage: gravity drain and condensate pump. If you don’t throw the manual in the trash bin, you don’t need my guide to know how to drain an undercounter ice maker.
But sometimes, accidents happen, or you found a great deal on a secondhand undercounter ice maker. We first start with the most common drainage of undercounter ice makers – gravity drain, or floor drain. As you can see in the list of the best undercounter ice maker, all of them are units with gravity drain. If you have one of them, congratulations, the ice maker will drain water itself. However, make sure you follow my guide on how to install an undercounter ice maker properly, because it’s necessary to position your ice maker correctly for the gravity drain to work.
Some high-end commercial ice makers will have a built-in pump to assist drainage. There is a float inside the waste water tank, and as water fill in and bring the float to a certain level, it triggers an internal switch and turn on the drain pump. As a result, the pump will drain out all of the water out of the ice maker.
When to drain an ice maker?
Ice makers should be drained regularly to maintain peak performance and prevent potential problems. For portable countertop models, drain after each use to prevent stagnant water from collecting minerals and harboring bacteria. Commercial or undercounter ice makers have their own drain system, so you don’t need to worry when to drain your ice makers. It’s better if you can let the ice maker dry before the next operation.
Key indicators that your ice maker needs immediate drainage include cloudy or odd-tasting ice, visible mineral deposits inside the unit, unusual noises during operation, or reduced ice production. To avoid these symptoms, once again, I recommend to drain the ice maker at least 1 per 2 days.
Conclusion
Knowing how to drain ice maker is a crucial maintenance skill that prevents costly repairs while extending your ice maker lifespan. This simple procedure takes just minutes but ensures you’ll always enjoy clean, fresh-tasting ice, especially for countertop ice makers. Regular drainage removes the bacteria that cause odors and the deposits that damage internal components. If you feel you don’t want to drain the ice maker manually, perhaps you should buy the best undercounter ice maker, normally drains the water by itself.


