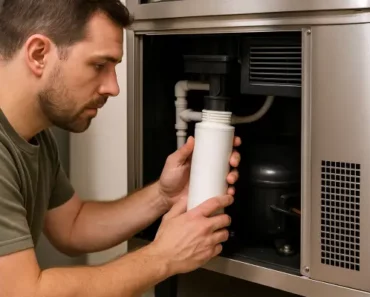
How to install an undercounter ice maker is not a complex skill that can learn and save hundreds in installation costs. When you know how to install your ice maker, it helps you understand how an ice maker work, and in case you need to troubleshoot why ice maker not working, you can easily indicate the problems.
Many people think that undercounter ice maker installation needs special skills they don’t have. I know, I earn my living because you hire me to do your installation job. However, the reality is that with proper guide, basic tools, and careful attention, you can install most undercounter ice makers yourself. You just need to know how does a commercial ice maker work, and everything works fine then.
Whether you’re upgrading your home bar with the real-deal ice maker, or setting up ice production for your business, learning this installation process gives you useful knowledge and confidence in your appliance. I believe you will have satisfaction in seeing your first batch of ice from a unit you installed yourself.
In this guide, I’ll take you through each step of the installation process clearly and thoroughly, using my practical experience to help you avoid common mistakes and complete the job successfully.
I’ve made a comprehensive “Ice Maker FAQ” series collecting all common ice maker problems to help Ice Artisan readers quickly troubleshoot their ice maker units.
- ⚖️ Countertop vs undercounter ice makers
- 👍 Are portable ice makers worth it?
- ⚡ How much electricity does an ice maker use?
- 💧 Does an ice maker use a lot of water?
- 🪣 Do ice makers need to be drained?
- 🚫 Can ice makers cause water damage?
- 🚰 Do ice makers need water lines?
- 🔊 Are countertop ice makers loud?
- 😭 Do ice makers make a lot of noise?
- 🔗 Are countertop ice makers safe?
- ⛺ Can ice makers be used outdoors?
- 🔌 Can ice makers be left running all the time?
- 🚗 Can ice makers be used in RV?
- 🗄️ Can ice makers be installed in cabinets?
- ❄️ Do portable ice makers keep ice frozen?
- 🛠️ Can ice makers be used in garages?
- 📄 Do ice makers store ice?
- 🚀 How do ice makers make ice so fast?
- 💡 How does ice maker work?
- 🎰 How does a commercial ice maker work?
- 🛠️ How to install an undercounter ice maker?
- ❄️ How to make clear ice in ice maker?
- 🪣 How to increase ice production in ice maker?
- ⏳ How long does an ice maker take to make ice?
- 🔗 When to replace ice maker filter?
- ⏱️ When to replace ice maker?
- 💡 How to clean ice maker?
- 😭 Why does my ice maker smell bad?
- 🫗 How to drain an ice maker?
- 🪣 How to unclog an ice maker?
- 🔗 How do I unstick my ice maker arm?
- 💧 How to fix ice maker leaking water?
- ❄️ Why is my portable ice maker making too much ice?
- 🥵 Why is my ice maker hot?
- 🔌 What happens if you don’t turn off the ice maker?
- 🧊 How to fix ice maker not making ice?
Ice Artisan‘s best picks
How to install an undercounter ice maker?
To install an undercounter ice maker, you need to measure your space carefully, connect a dedicated water line and drain, ensure proper electrical supply, level the unit correctly, and test all connections before running the ice maker.
Feel the answer too complicated? Below is a step-by-step guide to break down everything in details for you. I made this infographic to summarize the entire process in a clear, visual way.
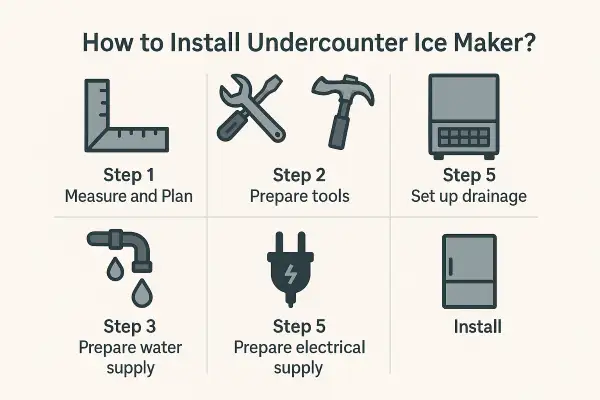
Step 1: Measure and plan
Before installing an undercounter ice maker, take time to measure your available space carefully. Check your undercounter ice maker’s dimensions carefully. Remember that proper ventilation is essential for your ice maker to function correctly, so allow for 1-2 inches of clearance space on both sides and at the rear of the unit. Every ice maker model may have slightly different requirements, so always consult your specific model’s manual for the exact measurements needed for your particular unit. Accurate measurements now will save you headaches during installation.
Step 2: Prepare tools
Prepare the right tools and materials for your undercounter ice maker installation. Make sure you have an adjustable wrench, level, screwdriver set, tubing cutter, and Teflon tape on hand for the job.
For the water connection, you’ll need food-grade 1/4-inch copper or braided stainless-steel tubing that safely handles drinking water, along with a compression valve to control water flow. Though not required, installing a water pre-filter is highly recommended as it helps making clearer ices and protects your ice maker’s filter from mineral deposits that can reduce its lifespan. Having everything prepared in advance prevents disruptions and ensures your installation proceeds efficiently from start to finish.
Step 3: Prepare water supply
Locate your water source. Then, shut off your main water supply to prevent any leaks or water damage while working on the pipes. Next, install either a needle valve or a T-adapter with shutoff valve at your connection point, which will allow you to control water flow to your ice maker independently. Read this article “Do ice makers need water lines?” for a thoughtful explanation.
For the tube itself, always use copper or braided stainless steel rather than plastic, as plastic tends to degrade over time and may affect water quality. Finally, run this water line from your connection point to your undercounter ice maker’s installation location, making sure to leave approximately 3-4 extra feet of tube. This extra length provides flexibility during installation and makes future maintenance or adjustments much easier.
Step 4: Set up drainage
Undercounter ice makers require proper drainage, and normally it will use either gravity drain or a condensate pump. If you have doubt with this statement, read this explanation: Do ice makers need to be drained?
A gravity drain system is the most common option, which requires a dedicated drain line positioned below the unit. This setup must include a proper P-trap installation to avoid sewer gases from backing up into your space.
Or else, some undercounter ice makers use a condensate pump system, which offers more flexibility in placement. If your unit uses a condensate pump, position it according to the manufacturer’s specifications, usually within 6 feet of the ice maker. The pump’s discharge line must be properly routed to a suitable drain point.
Step 5: Prepare electrical supply
Installing undercounter ice maker requires proper electrical supply to operate safely and efficiently. Ensure you have a dedicated 15-20 amp circuit available exclusively for your ice maker, as sharing circuits with other appliances can lead to overloads and tripped breakers.
Before connecting your unit, verify that your electrical outlet has proper grounding—if you’re unsure, it’s worth consulting with a licensed electrician rather than risking improper installation. For added safety, especially in kitchens and other moisture-prone areas, GFI (Ground Fault Interrupter) protection is strongly recommended as it prevents electrical shocks by cutting power when it detects current leakage. I also recommend to add a power conditioner for your undercounter ice maker.
These electrical precautions might seem excessive, but they protect both your undercounter ice maker investment and your home from potential electrical hazards.
Step 6: Install your undercounter ice maker
Positioning your undercounter ice maker correctly ensures optimal performance and longevity. Remove all packaging materials from your new unit, including any protective films on surfaces and colored transit brackets that secured moving parts during shipping.
Once unpacked, carefully place the ice maker in its intended installation location, making sure it fits the space you previously measured and planned. Most undercounter ice makers come with adjustable leveling legs that allow for precise positioning. An unlevel ice maker will experience uneven freezing cycles as water distributes improperly across the evaporator plate, leading to inconsistent ice production and potentially premature failure of key components like the compressor or water pump. Think of the ice maker similar to your fridge or washing machine.
Step 7: Finish installation
It’s time we finish installing your undercounter ice maker. First, connect the water line, which is straightforward, but requires attention to detail. Locate the inlet valve at the rear of the unit and prepare it by applying a moderate amount of Teflon tape to the male threads, just enough for a proper seal. Always begin by hand-tightening the connection to ensure proper alignment, then finish with approximately a 1/4 turn using your adjustable wrench. Do not over-tighten, as this can damage the thread or crush internal washers, creating leaks rather than preventing them.
Next, we connect the drainage. You should let at least 1/4 inch per foot along the entire drain line to prevent overflows. If your undercounter ice maker’s drain line came with insulation, keep this protective covering intact, as it prevents condensation from forming on the exterior of the line and potentially causing water damage to surrounding cabinetry.
Once all connections are in place, it’s time to test and turn on your undercounter ice maker. First, verify that all water and drain connections are secure and that you’ve removed any unnecessary things from the ice maker’s storage. Turn on your water supply slowly while watching each connection point for any signs of leakage. If you spot any leaks, turn off the water immediately and tighten or reseal the connection. When you’re confident everything is watertight, plug in your ice maker and follow the startup sequence outlined in your owner’s manual. Be patient—most undercounter ice makers need up to 24 hours to stabilize temperatures and cycles before starting optimal production capacity.
Finally, I advise you to always pay attention to the unit’s LED indicators, which alert most of the ice maker’s problems. Try to maintain the ambient temperature between 50-90°F, and don’t place other heat-producing appliances close to the undercounter ice maker (at least 12 inches away).
Conclusion
Installing an undercounter ice maker yourself brings real satisfaction while saving on professional installation costs. By following the steps above, you’ve not only saved money but also gained valuable knowledge about how your ice maker works – something that will help you maintain it properly in the future. It also help you to troubleshoot how to fix ice maker not making ice instantly, because you’re the person to install the ice maker yourself.
A properly installed undercounter ice maker typically lasts 2-3 years longer than manufacturer estimates, making your investment even more worthwhile. This extended lifespan comes directly from taking the time to install it correctly.
If you run into problems during installation, don’t struggle unnecessarily. Check the manufacturer’s resources or call a professional for advice. The small cost of expert help is much less than repairing damage from installation mistakes.

