How does ice maker work is a question many first-time buyers ask before investing in this convenient kitchen appliance. Understanding how the ice maker works can help you make a better buying decision and predict common issues that might happen. Even if you’re already an ice maker owner, knowing how it operates can help you maintain it better, thus keep the appliance for a longer time.
Ice makers transform ordinary tap water into perfectly formed ice cubes through a complex process that combines simple physics with innovative engineering. The convenience they offer, delivering ice on demand without the hassle of filling and emptying traditional ice trays, makes them more and more popular in modern homes. From compact countertop models to undercounter built-in ice makers, these appliances have revolutionized how we keep our beverages cold.
As summer comes, having a reliable source of ice becomes more than a luxury—it’s practically essential for comfortable living. Whether you’re a college student looking to survive the heat or a homemaker enjoying her coffee, understanding how these ice makers work will help you select the perfect model for your specific needs and budget.
I’ve made a comprehensive “Ice Maker FAQ” series collecting all common ice maker problems to help Ice Artisan readers quickly troubleshoot their ice maker units.
- ⚖️ Countertop vs undercounter ice makers
- 👍 Are portable ice makers worth it?
- ⚡ How much electricity does an ice maker use?
- 💧 Does an ice maker use a lot of water?
- 🪣 Do ice makers need to be drained?
- 🚫 Can ice makers cause water damage?
- 🚰 Do ice makers need water lines?
- 🔊 Are countertop ice makers loud?
- 😭 Do ice makers make a lot of noise?
- 🔗 Are countertop ice makers safe?
- ⛺ Can ice makers be used outdoors?
- 🔌 Can ice makers be left running all the time?
- 🚗 Can ice makers be used in RV?
- 🗄️ Can ice makers be installed in cabinets?
- ❄️ Do portable ice makers keep ice frozen?
- 🛠️ Can ice makers be used in garages?
- 📄 Do ice makers store ice?
- 🚀 How do ice makers make ice so fast?
- 💡 How does ice maker work?
- 🎰 How does a commercial ice maker work?
- 🛠️ How to install an undercounter ice maker?
- ❄️ How to make clear ice in ice maker?
- 🪣 How to increase ice production in ice maker?
- ⏳ How long does an ice maker take to make ice?
- 🔗 When to replace ice maker filter?
- ⏱️ When to replace ice maker?
- 💡 How to clean ice maker?
- 😭 Why does my ice maker smell bad?
- 🫗 How to drain an ice maker?
- 🪣 How to unclog an ice maker?
- 🔗 How do I unstick my ice maker arm?
- 💧 How to fix ice maker leaking water?
- ❄️ Why is my portable ice maker making too much ice?
- 🥵 Why is my ice maker hot?
- 🔌 What happens if you don’t turn off the ice maker?
- 🧊 How to fix ice maker not making ice?
Ice Artisan‘s best picks
How does an ice maker work?
An ice maker works by sending water into molds where a refrigeration system (using a compressor, condenser, expansion valve, and evaporator) cools it until frozen, then briefly heats the molds just enough to release the ice cubes into a collection bin. The entire process is orchestrated by sensors and a control board that monitor temperatures and regulate the cycle, automatically repeating when more ice is needed.
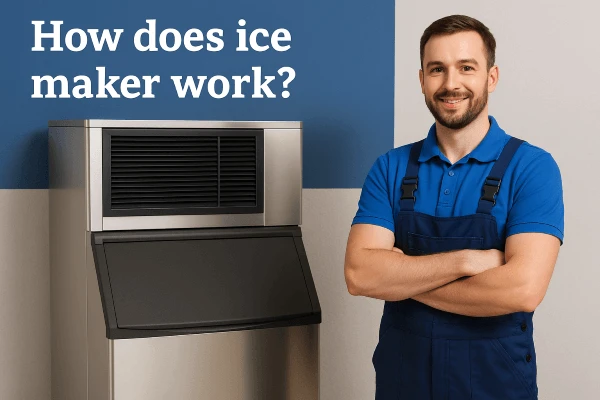
To understand how does ice maker work, you must know of one ice maker’s key components. The water supply line delivers fresh water into the system either from your home’s plumbing or a manually filled reservoir. The inlet valve regulates water flow, opening and closing on command from the control board to admit precisely the right amount of water for each cycle.
The evaporator plate or mold is where the transformation happens—liquid becomes solid. This is where the ice maker freezes water into perfectly formed ice cubes, with heat migrating from the water toward the cold refrigerant until the water reaches freezing point.
The refrigeration system consists of four crucial components working in sequence. The compressor pressurizes the refrigerant, transforming it from a low-pressure gas into a high-pressure, high-temperature gas. The condenser then cools this hot gas through metal tubes, allowing heat to dissipate and converting the refrigerant into a high-pressure liquid. Next, the thermostatic expansion valve (TXV) releases pressure in the refrigerant through rapid expansion, causing it to cool quickly through adiabatic cooling. Finally, in air-cooled models, a fan assists heat exchange by forcing air over the hot coils.
The control system includes thermostats and temperature sensors that detect when conditions are optimal for ice formation and harvest. The temperature gauge monitors the cooling process until the cubes reach the proper temperature for harvesting. Once ice forms completely, sensors trigger the harvest cycle, where the compressor redirects heated gas directly into the evaporator instead of the condenser, warming the tray slightly to loosen the ice.
How does the ice maker machine work? Step-by-step infographic
To help you capture how an ice maker works, I made this infographic that breaks down the entire process in a clear, visual way. You can also read the article of “How does a commercial ice maker work?” for specific commercial units.
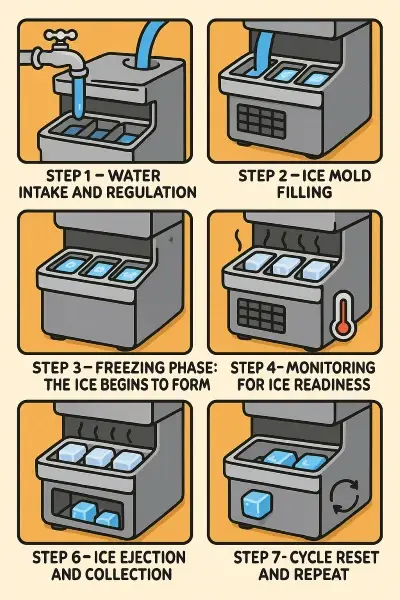
Step 1 – Water intake and regulation
Every ice-making cycle begins with water entering the machine. In most residential ice makers, this happens through a water supply line connected to your home’s plumbing. A small water valve opens electronically when the system signals it’s time to make more ice. This valve carefully controls the amount of water that flows into the ice maker, ensuring consistent cube sizes.
For portable countertop models, you’ll manually fill a reservoir with water. The machine then draws from this reservoir as needed. Either way, most ice makers contain a water filter to remove impurities that could affect the taste and clarity of your ice.
Step 2 – Ice mold filling
Once the water valve opens, water flows into specially designed ice molds. These molds determine the shape and size of your ice – whether they’re classic cubes, crescents, or bullet-shaped pieces. The water fills these compartments to a precise level, controlled by either timing mechanisms or sensors.
Think of this as similar to filling an ice tray, but the machine does the measuring for you automatically. This automation ensures that each ice cube is consistently sized, unlike hand-filled trays that might have varying levels of water.
Step 3 – Freezing phase
Now comes the actual freezing. The ice mold sits against a cooling element – essentially a metal plate that gets extremely cold. This plate is connected to the refrigeration system, which uses refrigerant (a special cooling fluid) to absorb heat from the water.
As the temperature drops, the water begins to freeze from the outer edges inward. The freezing process typically takes between 20-30 minutes, depending on your ice maker model and the temperature settings of your freezer or standalone unit. Read my article on “How long does an ice maker take to make ice?” showing exact time for different type of ice makers.
During this phase, the refrigeration system works much like your refrigerator does – compressing and expanding refrigerant to create a cooling effect. It’s basic thermodynamics at work in your kitchen!
Step 4 – Ice monitoring
Your ice maker doesn’t just set a timer and hope for the best. Most models actively monitor the freezing process to determine when the ice is fully formed. They do this in one of two ways:
- Temperature sensors detect when the ice mold reaches a certain temperature, indicating the water has completely frozen.
- Optical sensors in more advanced models actually “look” at the ice to determine when it’s fully formed.
This monitoring ensures you get perfectly frozen ice every time, rather than partially frozen slush or over-frozen, frosty cubes.
Step 5 – Thermal release
Once the ice is completely frozen, it needs to be removed from the mold. This is trickier than it sounds since ice naturally sticks to cold surfaces. The solution? A brief warming cycle.
The ice maker briefly reverses its operation, warming the mold surface just enough to melt the outer layer of ice that’s in contact with the mold. This creates a thin layer of water that acts as a lubricant, allowing the ice to slide out easily without melting the entire cube.
This clever heat-assisted release is why you don’t have to bang your ice maker like you might do with a traditional ice tray!
Step 6 – Ice harvest
With the ice now loosened from the mold, the ejection phase begins. Most ice makers use a motorized arm with “fingers” that sweep across the mold, pushing the ice cubes out. The cubes then fall into a collection bin below.
This collection bin is insulated to keep the ice frozen until you’re ready to use it. However, it’s worth noting that the bin isn’t actively cooled in most models, which is why ice can eventually melt if left unused for long periods.
Many modern ice makers include a feature that might interest busy households: an automatic shut-off when the collection bin is full. A sensing arm detects when ice reaches a certain level and temporarily stops production, preventing overflow.
Step 7 – Cycle reset
After ejection, the ice maker resets itself for another cycle. The water valve opens again, refilling the mold with fresh water, and the entire process begins anew. This cyclical operation continues until the ice bin is full or until you turn off the machine.
It takes time to produce ice. The full cycle typically requires 1-3 hours to produce a complete batch of ice, depending on your model and environmental conditions. For students or families hosting gatherings, planning ahead ensures you’ll have enough ice when needed!
Most residential ice makers can produce between 26-35 pounds of ice per day – more than enough for regular household use. So next time you enjoy a cold drink, you can appreciate the sophisticated yet simple process that created those perfectly formed ice cubes!
By understanding these seven steps of how ice makers work, you can make better purchasing decisions, use your appliance more effectively, and even perform basic troubleshooting when issues arise. Stay cool!


